PC Games
• Orb
• Lasagne Monsters
• Three Guys Apocalypse
• Water Closet
• Blob Wars : Attrition
• The Legend of Edgar
• TBFTSS: The Pandoran War
• Three Guys
• Blob Wars : Blob and Conquer
• Blob Wars : Metal Blob Solid
• Project: Starfighter
• TANX Squadron
Tutorials
• 2D shoot 'em up
• 2D top-down shooter
• 2D platform game
• Sprite atlas tutorial
• Working with TTF fonts
• 2D adventure game
• Widget tutorial
• 2D shoot 'em up sequel
• 2D run and gun
• Roguelike
• Medals (Achievements)
• 2D turn-based strategy game
• 2D isometric game
• 2D map editor
• 2D mission-based shoot 'em up
• 2D Santa game
• 2D split screen game
• 2D quest game
• SDL 1 tutorials (outdated)
Latest Updates
SDL2 Quest game tutorial
Wed, 7th May 2025
SDL2 Versus game tutorial
Wed, 20th March 2024
Download keys for SDL2 tutorials on itch.io
Sat, 16th March 2024
The Legend of Edgar 1.37
Mon, 1st January 2024
SDL2 Santa game tutorial 🎅
Thu, 23rd November 2023
Tags
• battle-for-the-solar-system (10)
• blob-wars (10)
• brexit (1)
• code (6)
• edgar (9)
• games (44)
• lasagne-monsters (1)
• making-of (5)
• match3 (1)
• numberblocksonline (1)
• orb (2)
• site (1)
• tanx (4)
• three-guys (3)
• three-guys-apocalypse (3)
• tutorials (18)
• water-closet (4)
Books

Firmware
HF-Tech's chips have changed the world. Embedded into the heads of over 90% of the world's population, they have cured autism, dementia, provided intelligence boosts, and helped to ease some of the more mundane tasks in life. Daniel Blair, hacker and Workshop member, however is not convinced that everything is as rosy as it seems. But is he looking in all the wrong places..?
— An old-school isometric game —
Part 5: Walls and trees
Note: this tutorial assumes knowledge of C, as well as prior tutorials.

Introduction
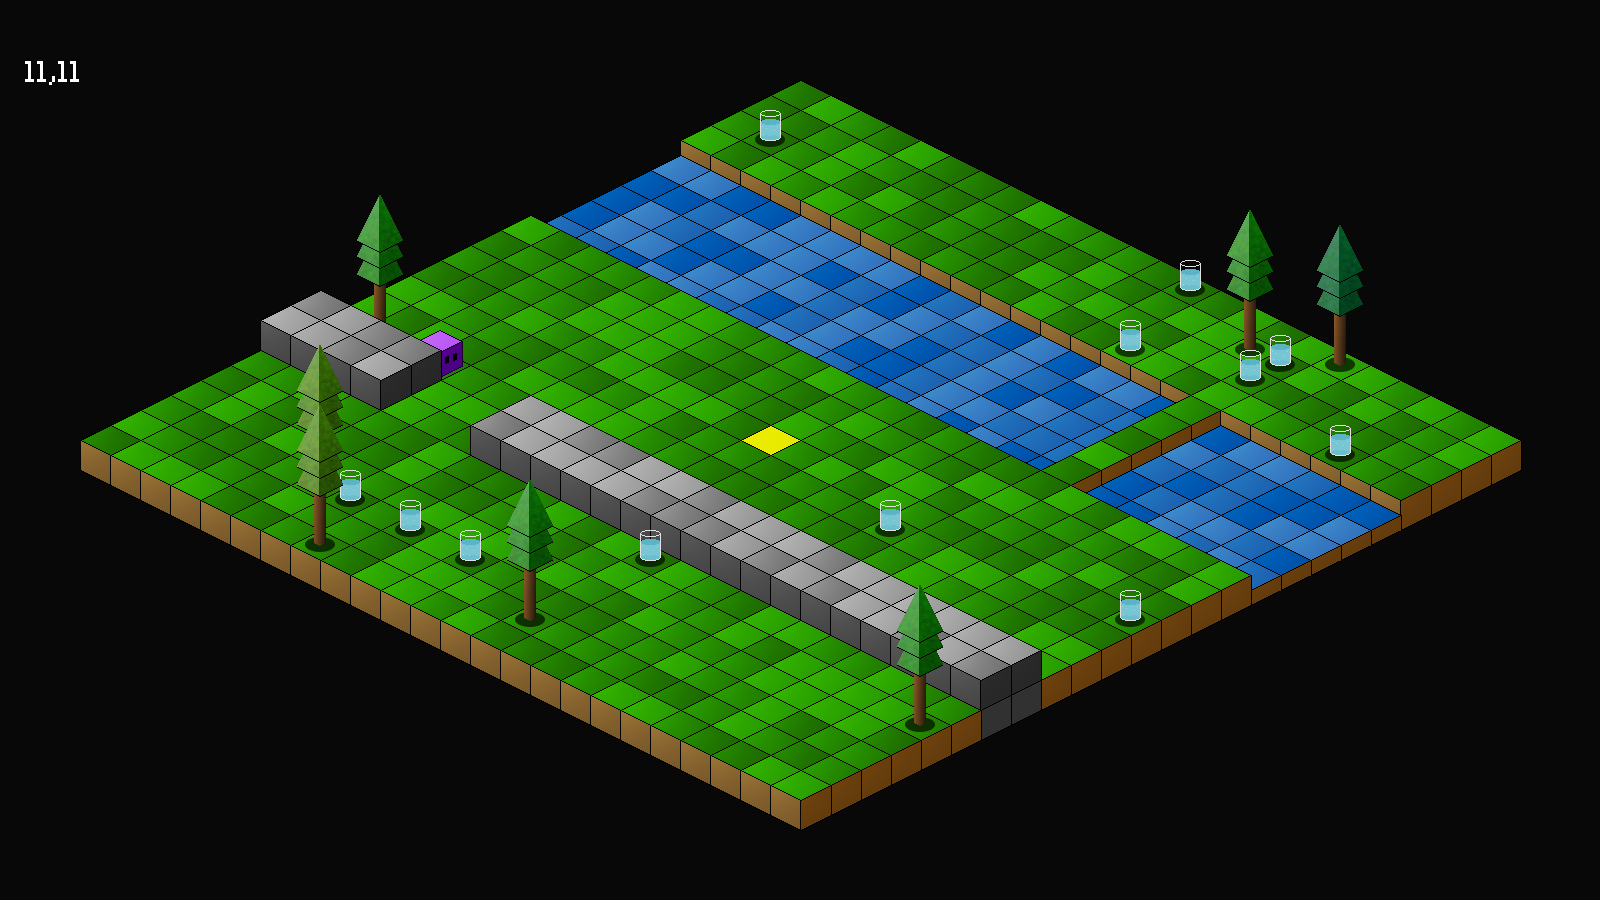
Time to decorate our map a little more. Walls are a staple of many adventure games, as well as ... almost every other game that has ever been made (even some set in space). We'll be adding those into this part, as part of the map data. We'll also be planting some trees. Both the walls and tress will be solid, meaning that they will block Purple Guy's path. Adding both of these is quite simple, as we'll see.
Extract the archive, run cmake CMakeLists.txt, followed by make, and then use ./isometric05 to run the code. You will see a window open like the one above. Click on ground squares to have Purple Guy move around. Notice how he moves behind objects, as we expect from our isometric view. Also notice how the A* guards him around solid objects, such as trees and walls. Once you're finished, close the window to exit.
Inspecting the code
Again, we've done a great deal of the work already, so this part will be relatively short, with just some tweaks to logic.
So, without further ado, starting with defs.h:
#define EF_NONE                   0
#define EF_SOLID                  (2 << 0)
We've added in some defines prefixed with EF_. These will be our entity flags. We've added in one from none (EF_NONE) and one to mark our entity has being solid (EF_SOLID).
Moving next to structs.h, we've updated Entity:
struct Entity {
	char name[MAX_NAME_LENGTH];
	int x;
	int z;
	int base;
	unsigned long flags;
	AtlasImage *texture;
	Entity *next;
};
We've added in a `flags` field, to support the flags that we've added in defs.h.
Now for tree.c, which is where we've defined our trees. Just one function here, initTree:
void initTree(Entity *e)
{
	char filename[MAX_FILENAME_LENGTH];

	sprintf(filename, "gfx/entities/tree%d.png", 1 + rand() % 3);

	e->base = -1;
	e->flags = EF_SOLID;
	e->texture = getAtlasImage(filename, 1);
}
As with the other entities, we're setting the `base` value. We're also setting the tree's `flags` as EF_SOLID, so that it obstructs our pathfinding. For the texture, we're randomly loading one of three images: gfx/entities/tree1.png, gfx/entities/tree2.png, or gfx/entities/tree3.png.
Easy! Now, onto map.c. We've tweaked initMap:
void initMap(void)
{
	int x, z;

	for (x = 0 ; x < MAP_RENDER_SIZE ; x++)
	{
		for (z = 0 ; z < MAP_RENDER_SIZE ; z++)
		{
			if (x > 14 && x < 20 && z != 17)
			{
				world.map[x][z].tile = rand() % 3;
			}
			else if (x >= 6 && x < 8 && (z < 4 || z > 6))
			{
				world.map[x][z].tile = TILE_WALL + rand() % 3;
			}
			else
			{
				world.map[x][z].tile = TILE_GROUND + rand() % 3;
			}
		}
	}

	loadTiles();
}
We're now adding in some walls. We're testing to see if `x` lies between 6 and 7, and also if `z` is not 4, 5, or 6, and changing that tile value to TILE_WALL (plus a random of 3, for variation in texture). This means that we will create a wall that is 2 tiles thick on the x axis, but with a gap 3 tiles wide on the z. This gives use space to walk around the wall (unless a bunch of trees are randomly added there!).
So far so good. Now onto drawMap, where things are a bit more interesting:
void drawMap(void)
{
	int x, z, n;

	for (x = 0 ; x < MAP_RENDER_SIZE ; x++)
	{
		for (z = 0 ; z < MAP_RENDER_SIZE ; z++)
		{
			n = world.map[x][z].tile;

			if (n >= 0)
			{
				if (world.routeHead.next == NULL && isGround(x, z) && x == world.cursor.x && z == world.cursor.z)
				{
					addISOObject(x, z, 0, 0, selectedTileTexture, LAYER_BACKGROUND);
				}
				else if (n >= TILE_WALL)
				{
					addISOObject(x, z, 0, -TILE_HEIGHT, tiles[n], LAYER_FOREGROUND);

					addISOObject(x, z, 0, 0, baseTileTexture, LAYER_BACKGROUND);
				}
				else
				{
					addISOObject(x, z, 0, 0, tiles[n], LAYER_BACKGROUND);
				}
			}
		}
	}
}
We're now testing to see if `n` is a wall and handling our drawing for that tile differently to the others. We're calling addISOObject as normal, but with an `sy` adjustment (4th parameter in addISOObject) of -TILE_HEIGHT, and a layer of LAYER_FOREGROUND. This will raise our tile up the screen, and also draw it after the rest of the map (remember how the layer order works). In effect, our walls will be drawn on the same layer as our entities. The -TILE_HEIGHT offset tweak is necessary to correctly align the tile graphics. With that drawn, we're also throwing in another ISOObject, this one drawn normally as a LAYER_BACKGROUND, but with a texture of baseTileTexture. The reason for this is to cover up a hole left beneath our tile, due to the height adjustment, that will be visible in some circumstance. Another way to handle this would simply be to make our wall tile graphic taller (by TILE_HEIGHT pixels). I'm doing it this way simply to demonstrate how to overcome such an issue if our tiles are all of the same height. One can see the hole left in the map by removing the line that adds the baseTileTexture ISOObject.
Lastly, we've updated loadTiles:
static void loadTiles(void)
{
	// snipped

	selectedTileTexture = getAtlasImage("gfx/tiles/exit.png", 1);

	baseTileTexture = getAtlasImage("gfx/tiles/base.png", 1);
}
Nothing special here, as we're just loading baseTileTexture.
That's just about it! Once more, nice and simple. Before we finish, let's look at the change we've made to aStar.c to make use of the EF_SOLID flag. Looking at the isBlocked function:
static int isBlocked(int x, int z)
{
	Entity *e;

	if (!isGround(x, z))
	{
		return 1;
	}

	e = getEntityAt(x, z);

	if (e != NULL && e != owner && (e->flags & EF_SOLID))
	{
		return 1;
	}

	return 0;
}
This function takes two parameters: `x` and `z`, which are map coordinates. We're simply checking that the tile we wish to move to during our A* search is a ground tile, and that a non-solid entity resides at the position (`owner` is the owner of the search, so we wish to ignore them).
And that's it! Hurrah! This is all coming along nicely, and we're speeding through things.
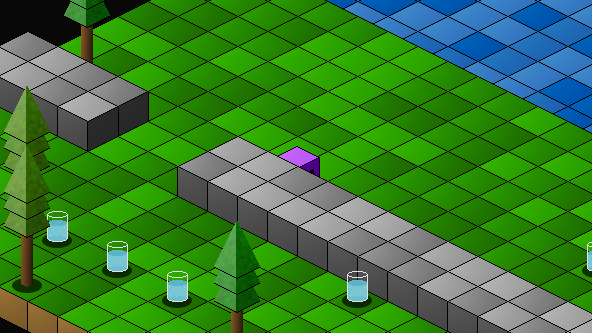
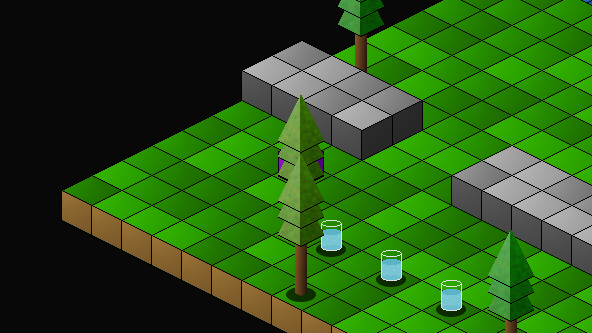
But hang on, there's an issue, which you no doubt will have witnessed while playing about. If you didn't, consider the two screenshots below:


When moving Purple Guy around, objects such as the walls and trees are able to block our view of him. That's no good, and could make him hard to see (and we're not playing Hide and Seek here). What would be good is if we could make those objects either disappear or become transparent when Purple Guy moves behind them.
So, in the next part, we're going to look into occlusion testing, that will help us to reveal Purple Guy's position when he's standing behind tall objects and walls.
Purchase
The source code for all parts of this tutorial (including assets) is available for purchase:
From itch.io
It is also available as part of the SDL2 tutorial bundle:


