PC Games
• Orb
• Lasagne Monsters
• Three Guys Apocalypse
• Water Closet
• Blob Wars : Attrition
• The Legend of Edgar
• TBFTSS: The Pandoran War
• Three Guys
• Blob Wars : Blob and Conquer
• Blob Wars : Metal Blob Solid
• Project: Starfighter
• TANX Squadron
Tutorials
• 2D shoot 'em up
• 2D top-down shooter
• 2D platform game
• Sprite atlas tutorial
• Working with TTF fonts
• 2D adventure game
• Widget tutorial
• 2D shoot 'em up sequel
• 2D run and gun
• Roguelike
• Medals (Achievements)
• 2D turn-based strategy game
• 2D isometric game
• 2D map editor
• 2D mission-based shoot 'em up
• 2D Santa game
• 2D split screen game
• 2D quest game
• SDL 1 tutorials (outdated)
Latest Updates
The Legend of Edgar 1.38
Thu, 1st January 2026
SDL2 Quest game tutorial
Wed, 7th May 2025
SDL2 Versus game tutorial
Wed, 20th March 2024
Download keys for SDL2 tutorials on itch.io
Sat, 16th March 2024
The Legend of Edgar 1.37
Mon, 1st January 2024
Tags
• battle-for-the-solar-system (10)
• blob-wars (10)
• brexit (1)
• code (6)
• edgar (10)
• games (45)
• lasagne-monsters (1)
• making-of (5)
• match3 (1)
• numberblocksonline (1)
• orb (2)
• site (1)
• tanx (4)
• three-guys (3)
• three-guys-apocalypse (3)
• tutorials (18)
• water-closet (4)
Books
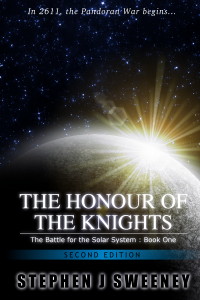
The Honour of the Knights (Second Edition) (Battle for the Solar System, #1)
When starfighter pilot Simon Dodds is enrolled in a top secret military project, he and his wingmates begin to suspect that there is a lot more to the theft of a legendary battleship and the Mitikas Empire's civil war than the Helios Confederation is willing to let on. Somewhere out there the Pandoran army is gathering, preparing to bring ruin to all the galaxy...
— An old-school isometric game —
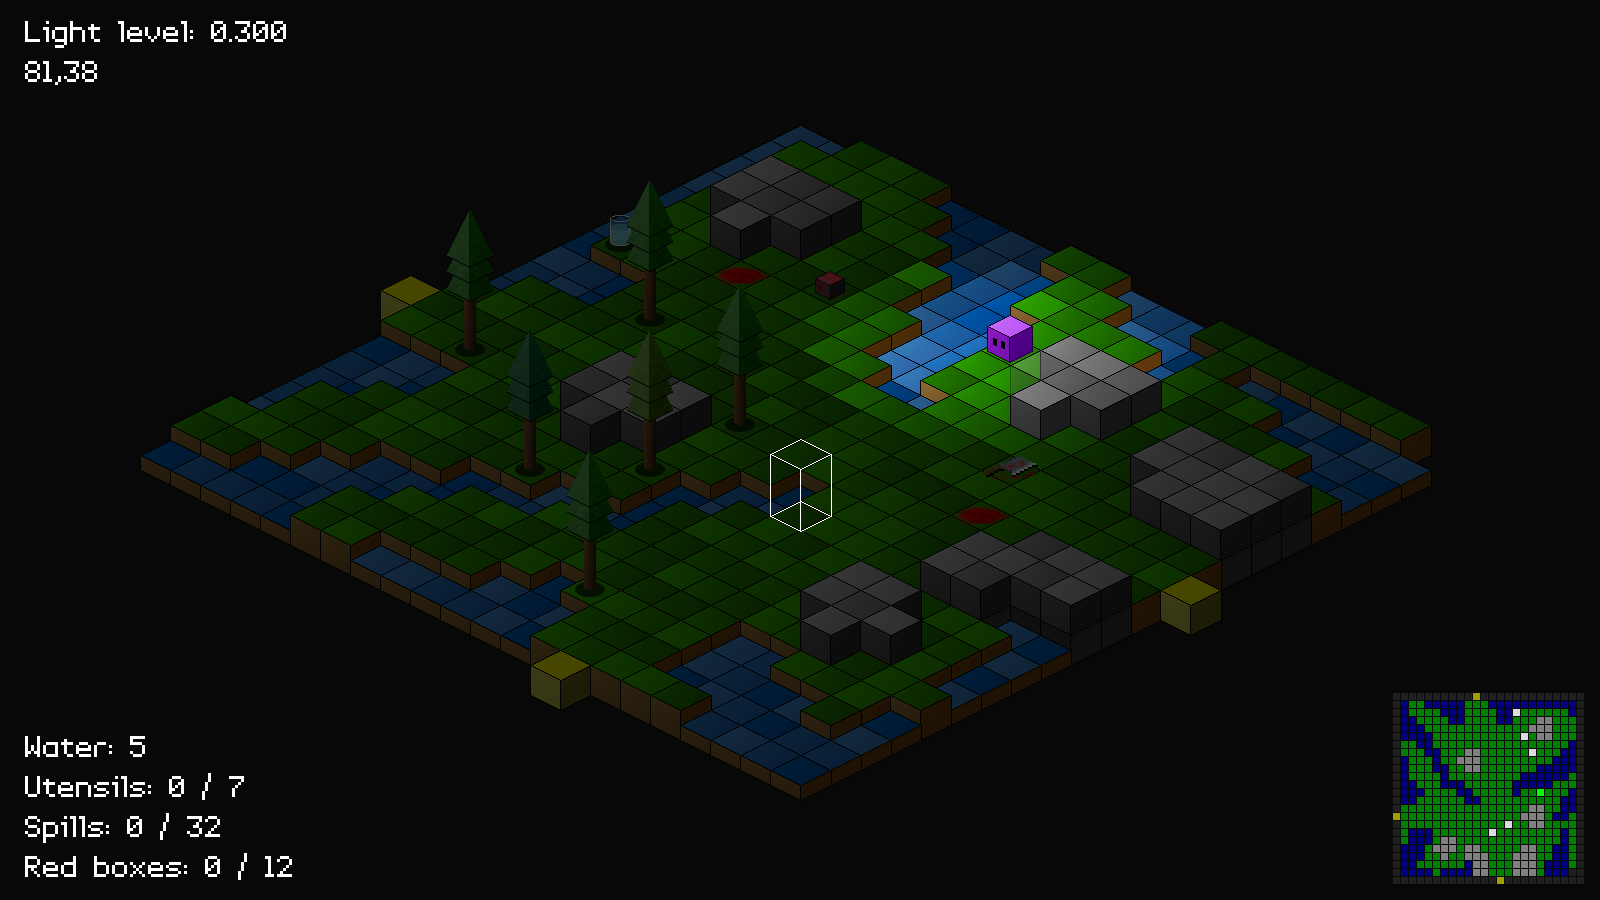
Part 11: Mini map
Note: this tutorial assumes knowledge of C, as well as prior tutorials.


Introduction
Having a mini map that we can consult while playing our game would be a small win, as it would allow us to more easily locate the items that we have to collect. Our mini map in this case is going to be limited to the current zone we're in, rather than the map as a whole. Even so, it will provide useful information.
Extract the archive, run cmake CMakeLists.txt, followed by make, and then use ./isometric11 to run the code. You will see a window open like the one above. Play the game as normal. Notice the mini map in the bottom right-hand corner of the screen. It shows the current zone. Blue and dark green squares represent water and ground, while grey squares show walls. The bright green square shows Purple Guy's position. White squares show items that can be collected, and yellow squares represent the exit tiles for the zone. Once you're finished, close the window to exit.
Inspecting the code
Adding in our mini map is a very simple task, as we'll see.
Let's start with defs.h:
#define EF_SHOW_ON_MINI_MAP (2 << 3)
We've added another entity flag. EF_SHOW_ON_MINI_MAP will be used to indicate that the entity should display on our mini map. We don't want all entities to show up, as things like trees will litter it, and just create unnecessary noise.
With that done, let's add the flag to the applicable entities. Starting with purpleGuy.c, and initPurpleGuy:
void initPurpleGuy(Entity *e)
{
	e->layer = LAYER_FOREGROUND;
	e->base = -13;
	e->flags = EF_SHOW_ON_MINI_MAP;
	e->isoFlags = IF_BRIGHT;

	world.player = e;
}
We're setting EF_SHOW_ON_MINI_MAP to his `flags`.
We do the same for glass.c, and initGlass:
void initGlass(Entity *e)
{
	e->layer = LAYER_FOREGROUND;
	e->texture = getAtlasImage("gfx/entities/glass.png", 1);
	e->base = -1;
	e->flags = EF_SHADOW + EF_SHOW_ON_MINI_MAP;

	e->touch = touch;
}
Here, we need to ensure that we're including both EF_SHADOW and EF_SHOW_ON_MINI_MAP for the glass's `flags`.
knife.c and initKnife comes next:
void initKnife(Entity *e)
{
	char filename[MAX_FILENAME_LENGTH];

	sprintf(filename, "gfx/entities/knife%d.png", 1 + rand() % 4);

	e->layer = LAYER_MID;
	e->texture = getAtlasImage(filename, 1);
	e->base = -8;
	e->flags = EF_SHOW_ON_MINI_MAP;

	e->touch = touch;

	world.totalUtensils++;
}
EF_SHOW_ON_MINI_MAP is set it the knife's `flags`. The same is done for redbox.c, in initRedBox:
void initRedBox(Entity *e)
{
	char filename[MAX_FILENAME_LENGTH];

	sprintf(filename, "gfx/entities/redCube%d.png", 1 + rand() % 7);

	e->layer = LAYER_FOREGROUND;
	e->texture = getAtlasImage(filename, 1);
	e->base = -10;
	e->flags = EF_SHOW_ON_MINI_MAP;

	e->touch = touch;

	world.totalRedBoxes++;
}
And in spill.c, in initSpill:
void initSpill(Entity *e)
{
	char filename[MAX_FILENAME_LENGTH];

	sprintf(filename, "gfx/entities/spill%d.png", 1 + rand() % 5);

	e->layer = LAYER_MID;
	e->texture = getAtlasImage(filename, 1);
	e->flags = EF_SHOW_ON_MINI_MAP;

	e->touch = touch;

	world.totalSpills++;
}
Now that we've added the flag to the entities we wish to affect, let's head over to hud.c, where we actually render our mini map.
We've updated drawHud by adding in a couple of new lines:
void drawHud(void)
{
	drawMiniMap();

	drawMiniMapEntites();

	drawInfo();
}
We're calling drawMiniMap and drawMiniMapEntites, two new functions that we'll look at now, starting with drawMiniMap:
static void drawMiniMap(void)
{
	int x, z, mx, mz, r, g, b;
	SDL_Rect rect;

	rect.w = MINI_MAP_SQUARE_SIZE - 1;
	rect.h = MINI_MAP_SQUARE_SIZE - 1;

	for (x = 0 ; x < MAP_RENDER_SIZE ; x++)
	{
		for (z = 0 ; z < MAP_RENDER_SIZE ; z++)
		{
			mx = x + world.camera.x;
			mz = z + world.camera.z;

			rect.x = SCREEN_WIDTH - (MAP_RENDER_SIZE * MINI_MAP_SQUARE_SIZE);
			rect.x -= 15;
			rect.x += x * MINI_MAP_SQUARE_SIZE;

			rect.y = SCREEN_HEIGHT - (MAP_RENDER_SIZE * MINI_MAP_SQUARE_SIZE);
			rect.y -= 15;
			rect.y += z * MINI_MAP_SQUARE_SIZE;

			if (world.map[mx][mz].tile == -1)
			{
				r = g = b = 32;
			}
			else if (x == 0 || z == 0 || x == MAP_RENDER_SIZE - 1 || z == MAP_RENDER_SIZE - 1)
			{
				r = g = 160;
				b = 0;
			}
			else if (world.map[mx][mz].tile < 10)
			{
				r = g = 0;
				b = 128;
			}
			else if (world.map[mx][mz].tile < 20)
			{
				r = b = 0;
				g = 128;
			}
			else
			{
				r = b = g = 128;
			}

			drawRect(rect.x, rect.y, rect.w, rect.h, r, g, b, 255);
		}
	}
}
It might look like there's a lot going on here, but it's actually very simple. First up, we're setting up an SDL_Rect (`rect`), that will be used to render each tile. `rect`'s width (`w`) and height (`h`) are set to MINI_MAP_SQUARE_SIZE - 1. MINI_MAP_SQUARE_SIZE is defined as 8. By setting the width and height as one pixel less, we can create a nice grid effect later on.
We then setup to for-loops, `x` and `z`, to go from 0 to MAP_RENDER_SIZE. For each iteration of the loop, we're setting two variables, `mx` and `mz`, to the values of `x` and `z`, plus the camera position. This will allow us to select the correct tile from the map, based on the camera's location. With that done, we set `rect`'s `x` and `y` coordinates. All this operation is doing is positioning our mini map in the bottom-right corner, 15 pixels away from the edges of the screen. MAP_RENDER_SIZE and MINI_MAP_SQUARE_SIZE are used in this calculation, meaning that if we change these values, our mini map will continue to render in the bottom-right of the screen, still 15 pixels from the edges. Note how we're using MINI_MAP_SQUARE_SIZE here, while our rect's width and height are one pixel less. Again, this creates the grid effect, due to the spacing.
We then test the value of the tile at `mx` and `mz`, and set the values of three variables, `r`, `g`, `b` (red, green blue), as appropriate. Empty tiles (-1) will be light grey, tiles at the edge will be yellow (to match our exit tiles), water tiles a dark blue, ground tiles a dark green, and walls are grey. Finally, we're calling drawRect (found in draw.c), passing over `rect`'s `x`, `y`, `w`, and `h`, and the `r`, `g`, `b` values that we set before.
So, in short, we're looping through all the tiles in the current zone, setting the position and dimensions of an SDL_Rect, setting some rgb values, and drawing the rectangle to screen. Once again, there is an optimisation that could happen here. We need not do this all the time, as we could render to a separate texture when the zone changes, and simply draw that simple image. Our game isn't complicated at the moment, so the performance hit in minimal.
Now onto drawMiniMapEntites:
static void drawMiniMapEntites(void)
{
	Entity *e;
	int x, z, r, g, b;
	SDL_Rect rect;

	rect.w = MINI_MAP_SQUARE_SIZE - 1;
	rect.h = MINI_MAP_SQUARE_SIZE - 1;

	for (e = world.entityHead.next ; e != NULL ; e = e->next)
	{
		if ((e->flags & EF_SHOW_ON_MINI_MAP) && isWithinISOScreen(e->x, e->z))
		{
			x = e->x - world.camera.x;
			z = e->z - world.camera.z;

			rect.x = SCREEN_WIDTH - (MAP_RENDER_SIZE * MINI_MAP_SQUARE_SIZE);
			rect.x -= 15;
			rect.x += x * MINI_MAP_SQUARE_SIZE;

			rect.y = SCREEN_HEIGHT - (MAP_RENDER_SIZE * MINI_MAP_SQUARE_SIZE);
			rect.y -= 15;
			rect.y += z * MINI_MAP_SQUARE_SIZE;

			if (e == world.player)
			{
				r = b = 0;
				g = 255;
			}
			else
			{
				r = g = b = 220;
			}

			drawRect(rect.x, rect.y, rect.w, rect.h, r, g, b, 255);
		}
	}
}
A shorter function than drawMiniMap, but one that shows some commonalities. We're once again making use of an SDL_Rect (`rect`) to hold our size and position. This time, we're looping through all the entities in the world, and testing whether they have the EF_SHOW_ON_MINI_MAP flag set. If so, we're next testing if they're in our current zone, via a call to isWithinISOScreen, and then proceeding to draw them. For their positions, we're assigning two variables, `x` and `z`, their positions, including camera offset, and then setting the rgb values. If the current entity (`e`) is the player, we're setting the rgb to be a bright green. Otherwise, we're setting them as a light grey. Then, as with drawMiniMap, we're calling drawRect, and passing over our SDL_Rect and rgb values.
And there you go! Nice and simple. We now have a mini map that will help us to spot items that might be hidden by the world view, and also give us an overview of the current zone. Something like this would come in especially handy if our zones were much larger, allowing us to take in more of the surrounding area.
Our game is more or less done. So, in the final part we'll be popping in some sound and music, to act as the finishing touches.
Purchase
The source code for all parts of this tutorial (including assets) is available for purchase:
From itch.io
It is also available as part of the SDL2 tutorial bundle: