PC Games
• Orb
• Lasagne Monsters
• Three Guys Apocalypse
• Water Closet
• Blob Wars : Attrition
• The Legend of Edgar
• TBFTSS: The Pandoran War
• Three Guys
• Blob Wars : Blob and Conquer
• Blob Wars : Metal Blob Solid
• Project: Starfighter
• TANX Squadron
Tutorials
• 2D shoot 'em up
• 2D top-down shooter
• 2D platform game
• Sprite atlas tutorial
• Working with TTF fonts
• 2D adventure game
• Widget tutorial
• 2D shoot 'em up sequel
• 2D run and gun
• Roguelike
• Medals (Achievements)
• 2D turn-based strategy game
• 2D isometric game
• 2D map editor
• 2D mission-based shoot 'em up
• 2D Santa game
• 2D split screen game
• 2D quest game
• SDL 1 tutorials (outdated)
Latest Updates
The Legend of Edgar 1.38
Thu, 1st January 2026
SDL2 Quest game tutorial
Wed, 7th May 2025
SDL2 Versus game tutorial
Wed, 20th March 2024
Download keys for SDL2 tutorials on itch.io
Sat, 16th March 2024
The Legend of Edgar 1.37
Mon, 1st January 2024
Tags
• battle-for-the-solar-system (10)
• blob-wars (10)
• brexit (1)
• code (6)
• edgar (10)
• games (45)
• lasagne-monsters (1)
• making-of (5)
• match3 (1)
• numberblocksonline (1)
• orb (2)
• site (1)
• tanx (4)
• three-guys (3)
• three-guys-apocalypse (3)
• tutorials (18)
• water-closet (4)
Books
The Honour of the Knights (First Edition) (The Battle for the Solar System)
When starfighter pilot Simon Dodds is enrolled in a top secret military project, he and his wingmates begin to suspect that there is a lot more to the theft of a legendary battleship and an Imperial nation's civil war than either the Confederation Stellar Navy or the government are willing to let on.
— Creating a Run and Gun game —
Part 4: Enemies
Note: this tutorial assumes knowledge of C, as well as prior tutorials.


Introduction
We've covered a lot of the basics of our run-and-gun game. We can run, gun, and shoot targets. But what we're missing is something to shoot back at us and provide some challenge. In this part, we'll introduce an enemy who will fire back. Right now, this enemy won't cause us any actual harm, even if the bullets do make contact. It will be a start, however.
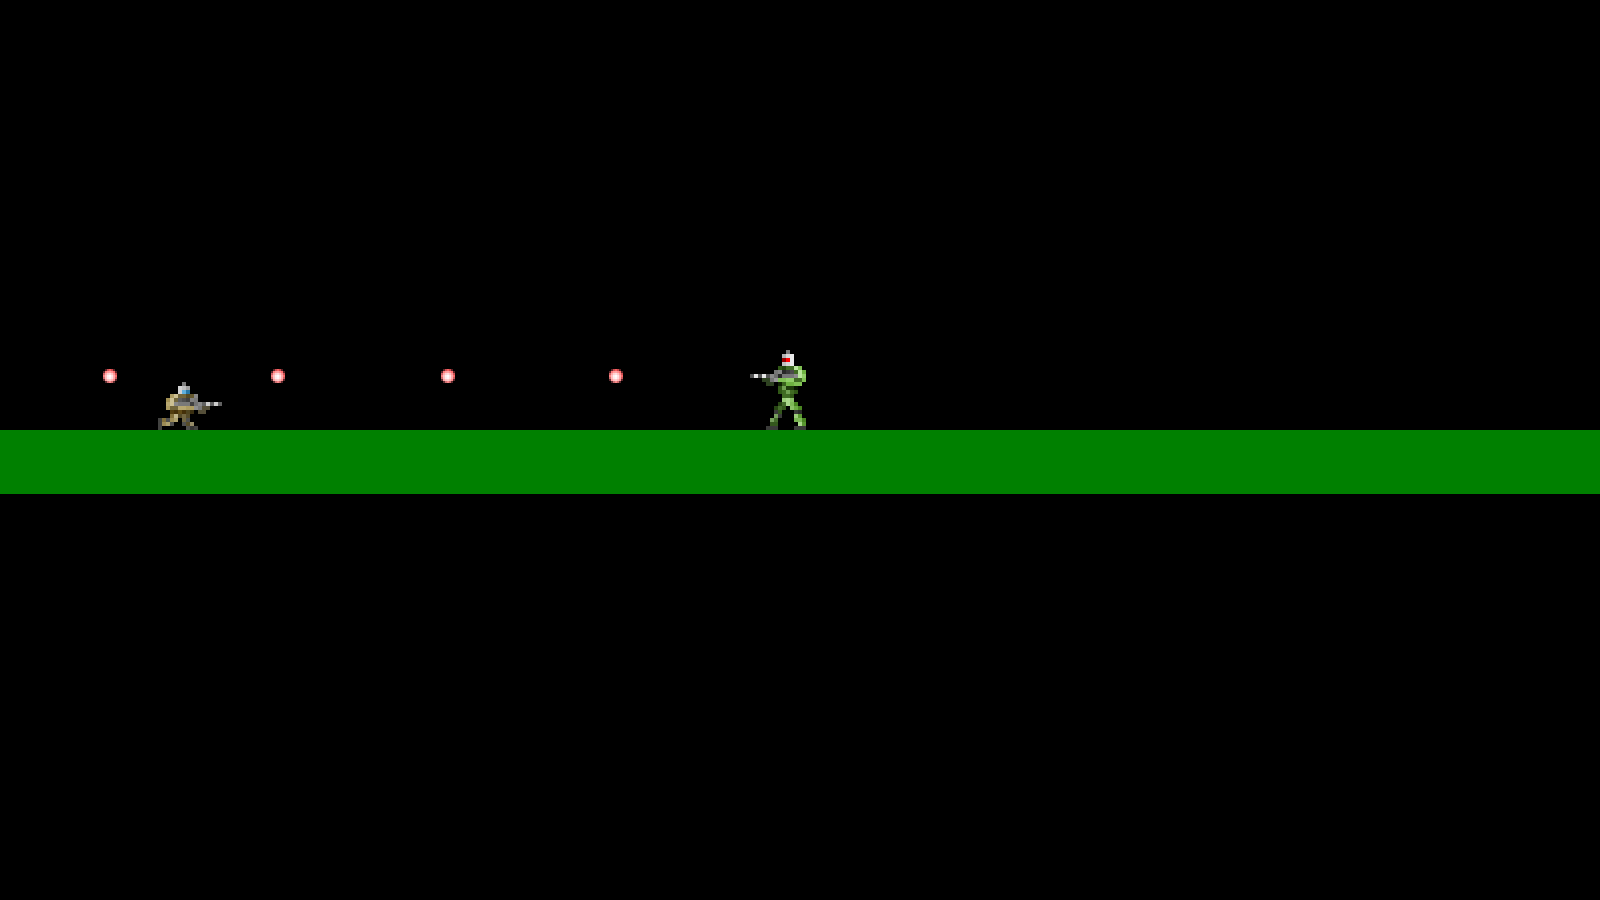
Extract the archive, run cmake CMakeLists.txt, followed by make, and then use ./gunner04 to run the code. You will see a window open like the one above, showing our main character on a black background, and an enemy character on the right, dressed in green. The enemy soldier will fire if he is facing the player. You can duck under his bullets to avoid being hit. If you are hit, you will flash for a second, but nothing more will happen. The enemy soldier can be killed by shooting him 5 times. Once you're finished, close the window to exit.
Inspecting the code
We've only had to add in one new struct to this part of the tutorial, and that's the enemy soldier himself. structs.h holds his defintion:
typedef struct {
	int life;
	double thinkTime;
	double damageTimer;
	int shotsToFire;
	double reload;
} EnemySoldier;
EnemySoldier is a generic struct that holds all the fields we need for our enemy soldier. `life` will be how much health the soldier has; thinkTime will be used as a counter to determine when next the soldier takes a new action; damageTimer is used to indicate damage taken, like with the Targets; shotsToFire controls how many bullets a soldier will fire when he attacks; and `reload` will control how fast our enemy fires.
We've also added a new field into our Gunner struct:
typedef struct {
	int frame;
	int ducking;
	int aimingUp;
	double animTimer;
	double reload;
	double immuneTimer;
} Gunner;
immunerTimer will be used to show that the player has been hit. We'll see more on this when we come to looking at the player updates.
Nothing taxing in there. Right now, we have just one enemy type, a green soldier. He is defined in greenSoldier.c. This file has a number of different functions, so we'll start from the top with initGreenSoldier:
void initGreenSoldier(Entity *e)
{
	EnemySoldier *s;

	s = malloc(sizeof(EnemySoldier));
	memset(s, 0, sizeof(EnemySoldier));

	if (standTexture == NULL)
	{
		standTexture = getAtlasImage("gfx/sprites/greenSoldierStand.png", 1);

		bulletTexture = getAtlasImage("gfx/sprites/enemyBullet.png", 1);
	}

	s->life = 5;
	s->thinkTime = FPS * (1 + rand() % 3);

	e->x = 750;
	e->y = 350;
	e->facing = FACING_RIGHT;
	e->texture = standTexture;
	e->data = s;

	e->tick = tick;
	e->draw = draw;
	e->takeDamage = takeDamage;
}
We're first mallocing and memsetting an EnemySoldier struct (assigning it to a variable called `s`), and then checking if we need to load its textures by testing if standTexture is NULL. If so, we'll load and assign both standTexture and bulletTexture, the textures we'll use for the soldier himself and the bullet he'll fire. With our textures loaded, we'll set the the EnemySoldier's `life` to 5, so he'll require 5 shots to defeat, and also set his thinkTime to a random between 1 and 3 seconds.
Next, we're setting the entity's attributes. Like our Gunner, our soldier is currently hardcoded in position. We'll set its `x` and `y` fields, and also tell the soldier he's facing right. We'll then assign the texture as standTexture, and set the `data` field as the EnemySoldier (`s`). Finally, we're setting the `tick`, `draw`, and takeDamage fields.
We come to the `tick` function next. It's rather simple, as we'll see:
static void tick(Entity *self)
{
	EnemySoldier *s;

	s = (EnemySoldier*) self->data;

	s->damageTimer = MAX(s->damageTimer - app.deltaTime, 0);

	s->reload = MAX(s->reload - app.deltaTime, 0);

	s->thinkTime = MAX(s->thinkTime - app.deltaTime, 0);

	if (s->shotsToFire == 0)
	{
		if (s->thinkTime == 0)
		{
			self->facing = rand() % 2 ? FACING_LEFT : FACING_RIGHT;

			s->thinkTime = FPS * (1 + rand() % 3);

			lookForPlayer(self);
		}
	}
	else if (s->reload == 0)
	{
		s->shotsToFire--;

		fireBullet(self);
	}

	self->hitbox.x = self->x + 16;
	self->hitbox.y = self->y;
	self->hitbox.w = 44;
	self->hitbox.h = self->texture->rect.h;
}
We're first extracting the EnemySoldier from the entity's `data` field, then decreasing the damageTimer, `reload`, and thinkTime fields. All these we're limiting to 0. After that, we're checking if the EnemySoldier is currently shooting. If shotsToFire is 0 (not shooting), we're then testing if their thinkTime is 0. If so, we'll have the soldier randomly face a direction. There's a 50-50 chance that he'll face left or right. We're doing so by simply assigning his `facing` field to FACING_LEFT or FACING_RIGHT, depending on the outcome of rand() % 2. With that done, we're resetting the thinkTime to between 1 and 3 seconds, and then calling a function named lookForPlayer. We'll see how this works in a little bit. If we do have shots to fire, we'll check if the EnemySoldier's `reload` is 0. If so, we'll decrease shotsToFire and call fireBullet.
Finally, we're setting the soldier's `hitbox`. Even though our soldier doesn't walk around, it's good to do this here, in case they fall to the ground from their original starting point.
Now we can look at the lookForPlayer function. It's basic:
static void lookForPlayer(Entity *self)
{
	if ((self->facing == FACING_LEFT && stage.player->x < self->x) || (self->facing == FACING_RIGHT && stage.player->x > self->x))
	{
		((EnemySoldier*) self->data)->shotsToFire = 2 + rand() % 4;
	}
}
We're simply testing the direction the soldier is facing and where the player is. If the soldier is facing left and the player's `x` coordinate is less then the soldier's, that means the soldier can see the player. If the soldier is facing right and the player's `x` is greater than the soldier's, he can also see the player. Once the player is spotted, we're randomly setting the EnemySoldier's shotsToFire to a random value between 2 and 5, to tell him to shoot.
Next, we'll look at our `draw` function. It's much the same as the `draw` function we created for the Targets:
static void draw(Entity *self)
{
	EnemySoldier *s;

	s = (EnemySoldier*) self->data;

	if (s->damageTimer == 0)
	{
		blitAtlasImage(self->texture, self->x, self->y, 0, self->facing == FACING_RIGHT ? SDL_FLIP_NONE : SDL_FLIP_HORIZONTAL);
	}
	else
	{
		SDL_SetTextureColorMod(self->texture->texture, 255, 32, 32);
		blitAtlasImage(self->texture, self->x, self->y, 0, self->facing == FACING_RIGHT ? SDL_FLIP_NONE : SDL_FLIP_HORIZONTAL);
		SDL_SetTextureColorMod(self->texture->texture, 255, 255, 255);
	}
}
Like the Targets, the EnemySoldier will render in two different states, depending on the value of their damageTimer. If damageTimer is 0, we'll draw the soldier normally. Otherwise, they'll be drawn in red.
The EnemySoldier's takeDamage function is also the same as that for the Target:
static void takeDamage(Entity *self, int amount)
{
	EnemySoldier *s;

	s = (EnemySoldier*) self->data;

	s->life -= amount;

	s->damageTimer = 4;

	if (s->life <= 0)
	{
		self->dead = 1;
	}
}
We're simply decreasing the soldier's `life` by the amount passed into the function, and then setting their damageTimer to 4. If the soldier's `life` falls to 0 or less, we're setting his `dead` flag to 1, to remove him from the game.
The last function is fireBullet, invoked when the enemy attacks the player:
static void fireBullet(Entity *self)
{
	Bullet *b;

	b = spawnBullet(self);
	b->texture = bulletTexture;
	b->hitbox.w = bulletTexture->rect.w;
	b->hitbox.h = bulletTexture->rect.h;
	b->damage = 1;
	b->life = FPS * 2;

	b->x = self->facing == FACING_RIGHT ? self->x + self->texture->rect.w : self->x;
	b->y = self->y + 19;
	b->dx = self->facing == FACING_RIGHT ? BULLET_SPEED : -BULLET_SPEED;

	((EnemySoldier*) self->data)->reload = RELOAD_SPEED;
}
We're first calling spawnBullet, to create a bullet, and passing in the enemy entity as the owner. Next, we're setting the `texture`, `hitbox`'s width and height to the same size as our texture, and the `damage` to 1. The bullet's `life` is also set to 2 seconds. Next, we're positioning the bullet. If the enemy is facing right, we're setting the bullet to be on right-hand side, by using the enemy's `x` and texture width. If they're facing left, we're setting the bullet's `x` to the same as the enemy's `x`. For the `y` position, the bullet will also be at the enemy's `y` + 19, so that it issues from the gun barrel. The bullet's `dx` will also depend on the direction the enemy is facing, being BULLET_SPEED (defined as 12) or -BULLET_SPEED depending on if they're facing right or left. The bullet moves slower than the player's, so they can be seen coming more easily. Finally, we're resetting the soldier's `reload` to RELOAD_SPEED (defined as 14), to make them pause for a moment before firing again. Higher and lower values will make the soldier fire slower and faster, respectively.
That's our enemy soldier done. He's quite simple, as you can see; he just stands there and fires at the player. We should look now at the changes we've made to the player. Since the enemy can fire at us, it's possible for us to take damage. Moving over to player.c, we've added in a new takeDamage function, which we're assigning to the player entity:
void initPlayer(Entity *e)
{
	// snipped

	e->tick = tick;
	e->draw = draw;
	e->takeDamage = takeDamage;

	stage.player = e;
}
We'll come to the takeDamage function in a little bit. We've also made some changes to `tick`:
void tick(Entity *self)
{
	Gunner *g;

	g = (Gunner*) self->data;

	g->immuneTimer = MAX(g->immuneTimer - app.deltaTime, 0);

	handleMovement(self);

	handleShoot(self);

	updateHitbox(self);
}
We're now decreasing immuneTimer, limiting it to 0. We're also making a call to a new function called updateHitBox, which we'll look at next:
static void updateHitbox(Entity *self)
{
	Gunner *g;

	g = (Gunner*) self->data;

	self->hitbox.w = 44;

	if (!g->ducking)
	{
		self->hitbox.x = self->x + 16;
		self->hitbox.y = self->y;
		self->hitbox.h = self->texture->rect.h;
	}
	else
	{
		self->hitbox.x = self->x + 12;
		self->hitbox.y = self->y + 34;
		self->hitbox.h = 46;
	}
}
Our hitbox will be used to test entity-to-entity collisions. As we saw at the end of the last part, when the player ducks, their hitbox remains the same. This would mean that bullets would still hit us if we were ducking. We've now made some changes to fix this. We're extracting the Gunner data from the player entity, and then checking if the player is ducking. If they're not, we're going to set the player's hitbox narrower than the player sprite. Since as know the size of our player sprite, we can hardcode these values. Our hitbox will be 44 pixel wide and be offset 16 pixels to the right of the player's position. The rectangle will remain the same height, however.
If we're ducking, our hitbox will be set to be shorter than the texture. We're setting the height of the hitbox to be 46 pixels, while the hitbox's `x` is the player's `x` plus 12. The hitbox's `y` is also set as the player's `y` plus 34. This creates a hitbox that's a tiny bit wider when ducking, but much shorter overall.
These hitbox changes can be viewed by pressing F1 during the game. Observe the difference between the hitbox when standing and ducking. You will see that due to the reduced height and position of the hitbox when ducking that the enemy bullets no longer make contact with it, thus allowing us to duck under enemy fire.
We've also updated our player rendering function. You will have noticed that when the player is hit by a bullet that they flash briefly. This is handled in `draw`:
static void draw(Entity *self)
{
	Gunner *g;

	g = (Gunner*) self->data;

	if ((int) g->immuneTimer % 5 == 0)
	{
		blitAtlasImage(self->texture, self->x, self->y, 0, self->facing == FACING_RIGHT ? SDL_FLIP_NONE : SDL_FLIP_HORIZONTAL);
	}
}
We're extracting the Gunner from the entity's `data` field, then testing its immuneTimer. If immuneTimer's modulo result of 5 is 0, then we'll call our blitAtlasImage function to draw the player. This means that when the player's immuneTimer is 0, they will always be visible. However, if immuneTimer is greater than 0 they will only be drawn sometimes. In effect, they will flicker while immuneTimer counts down. This effect will likely be familiar to you, as it's seen in a lot of 2D games.
At last, we come to the takeDamage function. There's not a lot to it:
static void takeDamage(Entity *self, int amount)
{
	((Gunner*) self->data)->immuneTimer = FPS;
}
We're grabbing the Gunner from our entity's `data` field and then setting the immuneTimer to 1 second. That's all; right now, we're not actually causing the player any harm.
As a result of allowing the enemies to fire, we should ensure that their own bullets don't hit them. We can do this in bullets.c, in checkCollisions:
static void checkCollisions(Bullet *b)
{
	Entity *e;

	for (e = stage.entityHead.next ; e != NULL ; e = e->next)
	{
		if (b->owner != e && e->takeDamage != NULL && collisionRects(&b->hitbox, &e->hitbox))
		{
			e->takeDamage(e, b->damage);

			b->life = 0;

			return;
		}
	}
}
Now, when looping through all the entities to check for collisions against the bullet, we're first checking that the bullet isn't owned by said entity. A small change, but an important one.
We're almost done. The only thing left to do is ensure that our soldier can be created. We can do this by updating initEntityFactory in entityFactory.c:
void initEntityFactory(void)
{
	memset(&head, 0, sizeof(InitFunc));
	tail = &head;

	addInitFunc("player", initPlayer);
	addInitFunc("target", initTarget);
	addInitFunc("greenSoldier", initGreenSoldier);
}
We're adding the initGreenSoldier function to our list of initFuncs, as "greenSoldier".
Finally, we should update initStage to actually spawn the soldier:
void initStage(void)
{
	memset(&stage, 0, sizeof(Stage));

	initEntities();

	initBullets();

	initEntity("player");

	initEntity("greenSoldier");

	app.delegate.logic = logic;
	app.delegate.draw = draw;
}
We've added a line to create the soldier, by calling initEntity and passing "greenSoldier" over.
That's it for creating an enemy soldier. Our opponent might not do a lot right now, and can be easily defeated, but that will all change in the future. In the next part, we'll look at introducing a map into the game, so we have something to move around on, other than a flat screen surface.
Purchase
The source code for all parts of this tutorial (including assets) is available for purchase:
From itch.io
It is also available as part of the SDL2 tutorial bundle: