— 2D Shoot 'Em Up Tutorial —
Part 6: Enemies

Introduction
Note: this tutorial builds upon the ones that came before it. If you aren't familiar with the previous tutorials in this series you should read those first.
At last, we have enemies on the screen. As we're still taking baby steps, they won't do anything interesting right now: just spawn from the right-hand side of the screen and move to the left. Still, it's a start. Extract the archive, run cmake CMakeLists.txt, followed by make to build. Once compiling is finished type ./shooter06 to run the code.
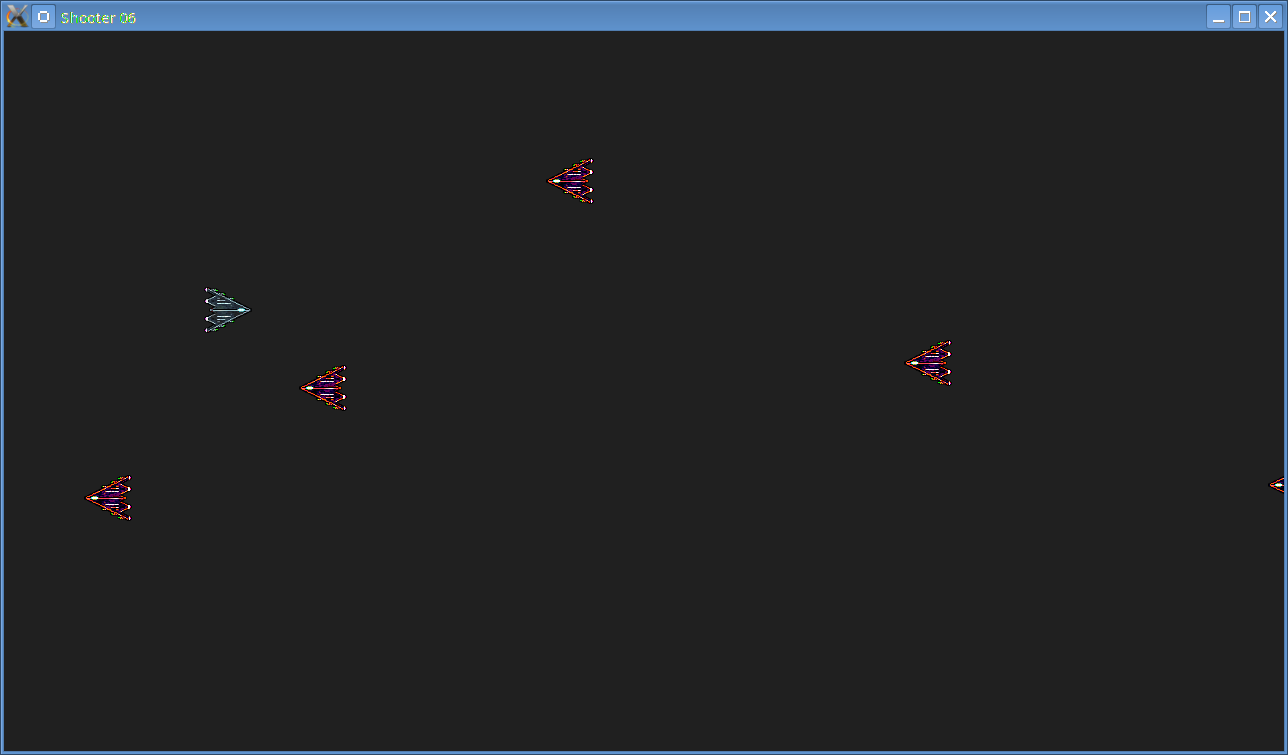
A 1280 x 720 window will open, with a near-black background. A spaceship sprite will also be shown, as in the screenshot above. The ship can now be moved using the arrow keys. Up, down, left, and right will move the ship in the respective directions. You can also fire by holding down the left control key. Enemies (basically red versions of the player's ship) will spawn from the right and move to the left. Close the window by clicking on the window's close button.
Inspecting the code
This time around, we've not made a great deal of changes. The only file that has been updated is stage.c. If we take a look, we can see that the changes within aren't that big (although there has been some refactoring here and there). Consider the initStage function to begin with:
void initStage(void)
{
	app.delegate.logic = logic;
	app.delegate.draw = draw;

	memset(&stage, 0, sizeof(Stage));
	stage.fighterTail = &stage.fighterHead;
	stage.bulletTail = &stage.bulletHead;

	initPlayer();

	bulletTexture = loadTexture("gfx/playerBullet.png");
	enemyTexture = loadTexture("gfx/enemy.png");

	enemySpawnTimer = 0;
}
We're doing just two new things in this function: loading enemyTexture and setting the enemySpawnTimer variable to 0 (both of these exist as static variables in stage.c) If we look next at the logic function, we can see there are similar minimal changes:
static void logic(void)
{
	doPlayer();

	doFighters();

	doBullets();

	spawnEnemies();
}
We're calling two new functions: doFighters and spawnEnemies. We'll look at doFighters first:
static void doFighters(void)
{
	Entity *e, *prev;

	prev = &stage.fighterHead;

	for (e = stage.fighterHead.next ; e != NULL ; e = e->next)
	{
		e->x += e->dx;
		e->y += e->dy;

		if (e != player && e->x < -e->w)
		{
			if (e == stage.fighterTail)
			{
				stage.fighterTail = prev;
			}

			prev->next = e->next;
			free(e);
			e = prev;
		}

		prev = e;
	}
}
This function deals with all the fighters on screen, including the player. The function steps through all the fighters in the fighter linked list in the stage object, adding each one's dx and dy to their x and y respectively, to move them. We then test to see if the fighter in question is the player. If it's not and it reaches the left-hand side of the screen (by testing to see if it's x coordinate is less than its w — its width — meaning it is fully offscreen), we delete it. And that's it for that function. Incidentally, since we're adding the fighters' dx and dy to their x and y, we've removed this from the doPlayer function. We'll consider spawnEnemies next.
static void spawnEnemies(void)
{
	Entity *enemy;

	if (--enemySpawnTimer <= 0)
	{
		enemy = malloc(sizeof(Entity));
		memset(enemy, 0, sizeof(Entity));
		stage.fighterTail->next = enemy;
		stage.fighterTail = enemy;

		enemy->x = SCREEN_WIDTH;
		enemy->y = rand() % SCREEN_HEIGHT;
		enemy->texture = enemyTexture;
		SDL_QueryTexture(enemy->texture, NULL, NULL, &enemy->w, &enemy->h);

		enemy->dx = -(2 + (rand() % 4));

		enemySpawnTimer = 30 + (rand() % 60);
	}
}
This function decrements enemySpawnTimer and adds an enemy once it falls below 1. The enemy is an Entity that is added to the stage object's fighter list and positioned at the right-hand side of the screen. The enemy's y coordinate is chosen randomly, based on SCREEN_HEIGHT, and the enemy's texture is set from the cached one we loaded earlier. The enemy's dx is also set randomly between -2 and -5, causing them to move from right to left at different speeds. Finally, enemySpawnTimer is reset to between 30 and 89 milliseconds (meaning a new enemy is created between 0.5 and 1.5 seconds).
The very last new function is again very simple in nature:
static void drawFighters(void)
{
	Entity *e;

	for (e = stage.fighterHead.next ; e != NULL ; e = e->next)
	{
		blit(e->texture, e->x, e->y);
	}
}
The drawFighters function merely steps through all the fighters in the linked list and draws each one of them, using the blit command. Note that we've removed the drawPlayer function, as the player is now drawn as part of the drawFighters function.
That's it for this tutorial. But now that we can fire and have enemies on screen, we can finally shoot them! The next part of the tutorial will look into collision detection and destroying the enemies.
Exercises
- Change the spawn rate of the enemies.
- Make the enemies move on the y axis, as well as the x.
- Prevent the enemies from leaving the top and bottom of the screen.
Purchase
The source code for all parts of this tutorial (including assets) is available for purchase:
From itch.io
It is also available as part of the SDL2 tutorial bundle:


