PC Games
• Orb
• Lasagne Monsters
• Three Guys Apocalypse
• Water Closet
• Blob Wars : Attrition
• The Legend of Edgar
• TBFTSS: The Pandoran War
• Three Guys
• Blob Wars : Blob and Conquer
• Blob Wars : Metal Blob Solid
• Project: Starfighter
• TANX Squadron
Android Games
Tutorials
• 2D shoot 'em up
• 2D top-down shooter
• 2D platform game
• Sprite atlas tutorial
• Working with TTF fonts
• 2D adventure game
• Widget tutorial
• 2D shoot 'em up sequel
• 2D run and gun
• Roguelike
• Medals (Achievements)
• 2D turn-based strategy game
• 2D isometric game
• 2D map editor
• 2D mission-based shoot 'em up
• 2D Santa game
• 2D split screen game
• SDL 1 tutorials (outdated)
Latest Updates
SDL2 Versus game tutorial
Wed, 20th March 2024
Download keys for SDL2 tutorials on itch.io
Sat, 16th March 2024
The Legend of Edgar 1.37
Mon, 1st January 2024
SDL2 Santa game tutorial 🎅
Thu, 23rd November 2023
SDL2 Shooter 3 tutorial
Wed, 15th February 2023
Tags
• battle-for-the-solar-system (10)
• blob-wars (10)
• brexit (1)
• code (6)
• edgar (9)
• games (43)
• lasagne-monsters (1)
• making-of (5)
• match3 (1)
• numberblocksonline (1)
• orb (2)
• site (1)
• tanx (4)
• three-guys (3)
• three-guys-apocalypse (3)
• tutorials (17)
• water-closet (4)
Books
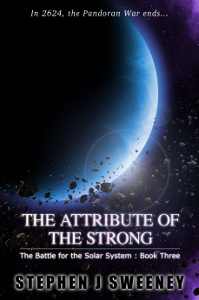
The Attribute of the Strong (Battle for the Solar System, #3)
The Pandoran War is nearing its end... and the Senate's Mistake have all but won. Leaving a galaxy in ruin behind them, they set their sights on Sol and prepare to finish their twelve year Mission. All seems lost. But in the final forty-eight hours, while hunting for the elusive Zackaria, the White Knights make a discovery in the former Mitikas Empire that could herald one last chance at victory.
— Simple 2D map editor —
Part 1: Simple map editor
Note: this tutorial assumes knowledge of C, as well as prior tutorials.


Introduction
Creating maps is a essential part of many games. For some of these tutorials - Pete's Pizza Party, SDL2 Adventure, SDL2 Isometric, and SDL2 Gunner - a crude editor was created, to allow the placement of tiles and entities. In this set of tutorials, we're going to look at how to create such an editor. Something you might be wondering is why bother making such a thing, when editors like Tiled exist. The simple answer is that one might not wish to use Tiled, or perhaps they want to learn how such a tool is developed, to gain better insight into game creation. As we'll see, making a basic editor is quite easy. However, if one requires more advanced features, such as property editing for entities and locations, it won't be found here. The emphasis here is on keeping things simple..!
Extract the archive, run cmake CMakeLists.txt, followed by make, and then use ./editor01 -edit example to run the editor. You will see a window open, displaying a scene like the one above. This is the editor window. Use the mouse to move the cursor around. The current tile will be snapped to the grid. Press (or hold) the left mouse button to place a tile. Press the right mouse button to remove a tile. Note that the player character (the green slime) cannot be moved. Once you're finished editing, press Space to save the map. If there are errors, these will be logged to the terminal. With your map saved, close the window to exit.
To play the stage, use ./editor01 -map example. You can control the slime character using A and D to move left and right. I will jump. You can also double-jump while in the air, by pressing I again. This action will reset when the player is on the ground again.
More maps can be created by simply running ./editor01 -edit <name> (where name is the name of the map you wish to create - don't use spaces), and running them with ./editor01 -map <name>. Map data is stored in the data/maps directory. When you're finished, close the window to exit.
Inspecting the code
Something to keep in mind - as the focus of this tutorial set is the map editor, we will only be touching on the actual game code that affects it; we won't discuss, for example, how the swimming, double jumping, particle effects, etc. are handled, as we've seen stuff like this in past tutorials.
For this tutorial, we're really only going to be interested in a single file: editor.c. This is where all the logic and rendering for the editor itself will live. You might think that this file will become huge, but in fact by the end it will only comprise about 500 or 600 lines. Right now, however, it's fairly small. Let's dive in.
Starting from the top, the first function we come to is initEditor:
void initEditor(void)
{
	app.dev.isEditor = 1;

	SDL_ShowCursor(1);

	initBackground();

	loadTiles();

	initEntities();

	initMap();

	addDefaultEntities();

	currentTile = 1;

	app.delegate.logic = logic;
	app.delegate.draw = draw;
}
The first thing we're doing is setting App's dev's isEditor flag to 1. This is so that we can test in other places in the game whether we're in the editor. We'll see how this is used later on. Next, we turn the mouse cursor on, using SDL_ShowCursor. By default, it is off in init.c, but we want it to be visible for our editor. Next, we perform various setup steps, by calling initBackground, loadTiles, initEntities, and initMap. These are all things that will happen in the game itself, too. Next, we come to a function called addDefaultEntities. We'll see this in a moment, but the idea is to add in required entities to a fresh map. We next set a variable called currentTile to 1. currentTile will be the map tile we're working with while placing tiles on our map. Like most other tile maps, our map is a multi-dimensional array of ints. Finally, we set our `logic` and `draw` delegates.
A simple start. Now let's look at addDefaultEntities:
static void addDefaultEntities(void)
{
	Entity *e;

	if (stage.entityHead.next == NULL)
	{
		e = initEntity("player");
		e->x = 50;
		e->y = 300;
	}
}
Nothing complex here. We're testing if there are any entities on our map (by checking if our linked list has entries), and if not, we're creating one called "player", and setting its `x` and `y` values. This step will basically be performed when a user creates a new map. Since we always require the player (and some other entities later on), we're creating it by default.
With that done, let's look at the `logic` function:
static void logic(void)
{
	mouseTile.x = (app.mouse.x + stage.camera.x) / MAP_TILE_SIZE;
	mouseTile.y = (app.mouse.y + stage.camera.y) / MAP_TILE_SIZE;

	doMouse();

	doKeyboard();
}
We're doing a few things here. First, we're setting the `x` and `y` values of a variable called mouseTile (an SDL_Point). We're taking the App's mouse's `x` and `y` values, adding the Stage's camera's `x` and `y`, and then dividing the result by MAP_TILE_SIZE. What this means is that we're effectively snapping the mouse's coordinates to a grid of MAP_TILE_SIZE. mouseTile's `x` and `y` will end up being tile indexes that we can then use with our map. While we have no camera control right now, we're going to pre-empt the addition of it.
We're then calling doMouse and doKeyboard, both of which we'll look at now, starting with doMouse:
static void doMouse(void)
{
	if (isInsideMap(mouseTile.x, mouseTile.y))
	{
		if (app.mouse.buttons[SDL_BUTTON_LEFT])
		{
			stage.map[mouseTile.x][mouseTile.y] = currentTile;
		}

		if (app.mouse.buttons[SDL_BUTTON_RIGHT])
		{
			stage.map[mouseTile.x][mouseTile.y] = 0;
		}
	}
}
As one can see, doMouse is a very simple function. We're first testing if the our mouseTile's `x` and `y` values are inside the map, via isInsideMap, and then handling the mouse buttons. If the left mouse button is pressed, we'll set the value of the map tile at mouseTile's `x` and `y` to the value of currentTile. If the right mouse button is pressed, we'll set the tile to 0 (empty space). Notice that we're not clearing the mouse button when testing it, allowing us to hold down the buttons and drag them around the screen, to quickly "paint" sections.
Now over to doKeyboard. There's not too much happening here:
static void doKeyboard(void)
{
	if (app.keyboard[SDL_SCANCODE_SPACE])
	{
		SDL_LogMessage(SDL_LOG_CATEGORY_APPLICATION, SDL_LOG_PRIORITY_INFO, "Saving map '%s' ... ", stage.name);

		if (!saveMap() || !saveEntities())
		{
			SDL_LogMessage(SDL_LOG_CATEGORY_APPLICATION, SDL_LOG_PRIORITY_WARN, "Failed to save map!");
		}
		else
		{
			SDL_LogMessage(SDL_LOG_CATEGORY_APPLICATION, SDL_LOG_PRIORITY_INFO, "Saving map '%s' ... Done", stage.name);
		}

		app.keyboard[SDL_SCANCODE_SPACE] = 0;
	}
}
We're testing to see if Space has been pressed. If so, we're going to save the map data and the entities. We calling both saveMap (defined in map.c) and saveEntities (defined in entities.c), and testing the results of each. If either of these fails to save, we're going to print a warning. Otherwise, we'll let the user know everything is okay.
Next, we come to the draw function:
static void draw(void)
{
	drawBackground();

	drawEntities(LAYER_BACKGROUND);

	drawMap(LAYER_BACKGROUND);

	drawEntities(LAYER_FOREGROUND);

	drawMap(LAYER_FOREGROUND);

	drawGridLines(MAP_TILE_SIZE);

	blitAtlasImage(tiles[currentTile], (mouseTile.x * MAP_TILE_SIZE) - stage.camera.x, (mouseTile.y * MAP_TILE_SIZE) - stage.camera.y, 0, SDL_FLIP_NONE);

	drawOutlineRect((mouseTile.x * MAP_TILE_SIZE) - stage.camera.x, (mouseTile.y * MAP_TILE_SIZE) - stage.camera.y, MAP_TILE_SIZE, MAP_TILE_SIZE, 255, 255, 0, 255);
}
Again, we're calling functions that are used by the game itself: drawBackground, drawEntities, and drawMap. We're also calling a function named drawGridLines, to put our grid lines on screen. We'll see this function in a moment. Lastly, we're drawing the current map tile, via blitAtlasImage. We're rendering it at the mouse's coordinates, snapped to the grid, so that the user can see which part of the map they're currently over. We're finally calling drawOutlineRect, with the same values as our mouse's grid snapped position, in yellow. This outline will help us to locate the mouse and the current tile on screen, especially useful when the current tile is the same as that which is on screen, stopping it from getting lost.
The final function in editor.c is loadTiles:
static void loadTiles(void)
{
	int  i;
	char filename[MAX_FILENAME_LENGTH];

	for (i = 0; i < MAX_TILES; i++)
	{
		sprintf(filename, "gfx/tiles/%d.png", i);

		tiles[i] = getAtlasImage(filename, 0);
	}
}
As one might expect, this simply fetches all the map tile graphics from our texture atlas, and fills an array of MAX_TILE in length. We've seen this in a few other tutorials, and the idea is to find all the tile graphics that are available for us to work with. Note when drawing the current tile, we're using the value of currentTile as the index in the tiles array (which is hardcoded to 1 right now).
That's all there is to the editor itself. We'll quickly go over some of the other function we're using, starting with draw.c, and drawGridLines:
void drawGridLines(int spacing)
{
	int x, y;

	SDL_SetRenderDrawColor(app.renderer, 0, 0, 0, 255);

	for (x = 0; x < SCREEN_WIDTH; x += spacing)
	{
		SDL_RenderDrawLine(app.renderer, x, 0, x, SCREEN_HEIGHT);
	}

	for (y = 0; y < SCREEN_WIDTH; y += spacing)
	{
		SDL_RenderDrawLine(app.renderer, 0, y, SCREEN_WIDTH, y);
	}
}
This function takes an argument called `spacing`, which is how big we want each of our grid cells to be. We first use SDL_SetRenderDrawColor to set our drawing colour to black (rgba = 0, 0, 0, 255). We then setup a for-loop using `x`, increasing the value of `x` by `spacing` on each iteration. We then SDL_RenderDrawLine, passing over the current `x` value and 0 for the starting point, and `x` and SCREEN_HEIGHT for the end point. This will basically draw a series of vertical lines, that will cross the screen. We then do the same for the horizontal, setting up a for-loop using `y`, and passing 0 , `y` and SCREEN_WIDTH , `y` to SDL_RenderDrawLine, resulting in a series of horizontal lines across the screen. This produces our grid, the size of which can be changed by altering the value of `spacing`.
If we head over to map.c next, we'll look at loadMap:
void loadMap(void)
{
	int   x, y;
	char *data, *p, *filename;

	filename = getMapFilename();

	if (fileExists(filename))
	{
		// snipped
	}
	else if (!app.dev.isEditor)
	{
		printf("Couldn't load '%s'\n", filename);
		free(filename);
		exit(1);
	}

	free(filename);
}
This is a standard function for reading the map data from file. Notice that we're checking to see if the file exists before attempting to load. If it doesn't, and we're not in editor mode (isEditor), we'll print an error, and exit. A non-existant file isn't allowed when we're playing the game, but for the editor, we're okay to start with an empty map.
Looking at saveMap next, we can see how we're handling the ability to write the files:
int saveMap(void)
{
	FILE *fp;
	char *filename;
	int   x, y, rtn;

	filename = getMapFilename();

	fp = fopen(filename, "w");

	if (fp)
	{
		// snipped

		rtn = 1;
	}
	else
	{
		rtn = 0;
	}

	free(filename);

	return rtn;
}
We're simply checking that fp, the file handle returned from fopen, is valid. If not, we're going to return 0, to let the caller know something went wrong (as seen in editor.c when we press Space to save).
The next function is getMapFilename:
static char *getMapFilename(void)
{
	return formattedString("data/maps/%s.dat", stage.name);
}
This function exists to provide a common place to get the filename of our maps. Our maps will always be loaded and saved to the "data/maps" directory, with a filename of the Stage's name, plus ".dat". Using a common function for this means that we don't introduce inconsistencies.
Jumping over to entities.c, we can see that we're handling the loading and saving in a very similar fashion. Starting with loadEntities:
static void loadEntities(void)
{
	cJSON  *root, *node;
	char   *text, *type, *filename;
	int     x, y;
	Entity *e;

	filename = getEntitiesFilename();

	if (fileExists(filename))
	{
		// snipped
	}
	else if (!app.dev.isEditor)
	{
		printf("Couldn't load '%s'\n", filename);
		free(filename);
		exit(1);
	}

	free(filename);
}
If we couldn't load the entity data, and we're not in editor mode (isEditor), we're going to display an error and exit.
The same thing happens in saveEntities:
int saveEntities(void)
{
	Entity *e;
	cJSON  *root, *entityJSON;
	char   *filename, *out;
	int     rtn;

	root = cJSON_CreateArray();

	// snipped

	out = cJSON_Print(root);

	filename = getEntitiesFilename();

	rtn = writeFile(filename, out);

	cJSON_Delete(root);

	free(filename);

	free(out);

	return rtn;
}
The writeFile function (defined in util.c) will return whether the data could be saved (1 = true, 0 = false), which we'll then bubble up to the caller.
And finally, entities.c also has a function to provide the name of our entities filename, to act as a single point of truth:
static char *getEntitiesFilename(void)
{
	return formattedString("data/maps/%s.json", stage.name);
}
Our entities will always be saved to "data/maps", with a filename of the Stage's name, plus ".json".
And there we go! The first part of our editor is done. We've got a very basic editor that allows us to place and remove a fixed tile. It might not look like much, but we can already design multiple levels, and save them.
In the next part we'll look at allowing us to select from the various different tiles.
Purchase
The source code for all parts of this tutorial (including assets) is available for purchase:
From itch.io
It is also available as part of the SDL2 tutorial bundle: